What is an FTP account?
An essential part of the website setup process is publishing it online, which includes uploading its files to the server where the website is planned to be located. One of the quickest and easiest ways to do it is by accessing the server via FTP. In order for the users to be able to connect to the host server through an FTP client, they need to have rights to access that server. These authorization access rights are assigned to users in the form of FTP accounts.
Each FTP account consists of a unique username and password granting users access to the files to the special cPanel account on the server.
FTP account is automatically created in cPanel when you sign up for a hosting cPanel account or create an addon domain. So, by default, you already have an FTP account in your cPanel. Use your cPanel username and password to log into it.
You can create new FTP accounts to give access to other users without giving them your cPanel login credentials. For each additional FTP account created, you can also give each user different levels of access by assigning the user to a specific directory.
How to create FTP account?
1. Log into your cPanel account.
2. Click on the FTP Accounts menu in the Files section.
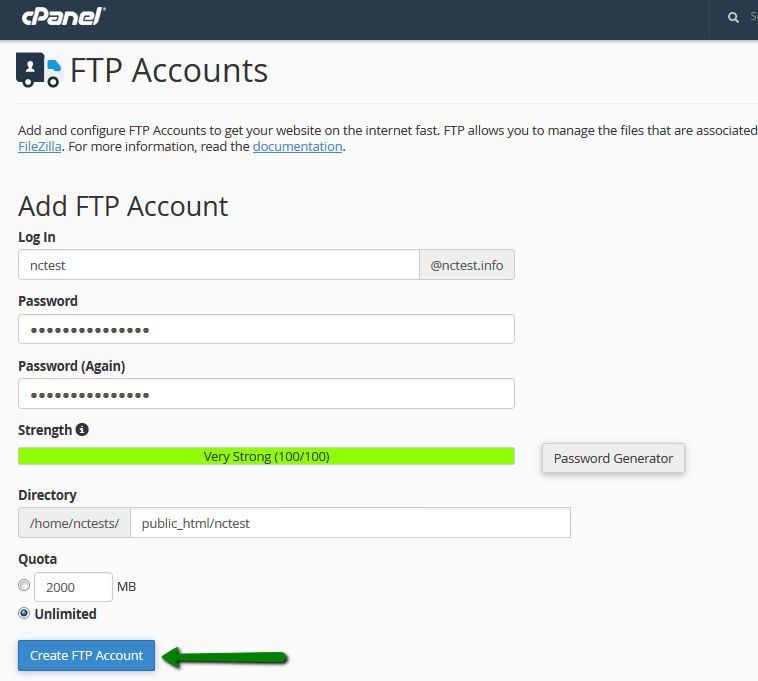
3. It will be needed to fill in the FTP account information in each field. Here is the detailed description below:
- Login: enter the desired username for your FTP account. It will be combined with your main domain name to create the full username. In our example we enter nctutorial in the Login field, so the full Username will be nctutorial@nctest.info
- Password: enter a strong and secure password in this field for your FTP account. You can use Password Generator for this option.
- Password (again): enter the same password here to confirm the spelling.
- Strength: this field informs you how secure your password is. Strength levels range from Very Weak to Very Strong.
- Directory: when you create an FTP account, it is limited to the directory you indicate here. cPanel will auto-fill an assumed directory based on the FTP username. You can erase everything after public_html/ and provide the directory you would like the user to access. You can also type a single / and the user will have access to your home directory (anything outside of the public_html folder).
PLEASE NOTE: You can determine the level of access for a user. The FTP user will not be able to navigate outside of the specified directory. However, he/she will be able to access all files and subfolders inside that folder.
- Quota: you can limit the disk space available for an FTP user here or set it to Unlimited.
NOTE: Remove nctest in the Directory field to provide the access to the root directory of the site.
4. Click the Create FTP Account button. You will then see a notification stating Account Created:

You will see your account created below under the FTP Accounts section. There will be four options to manage your FTP account:
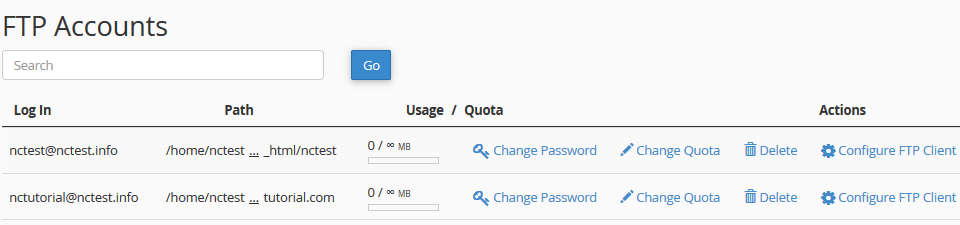
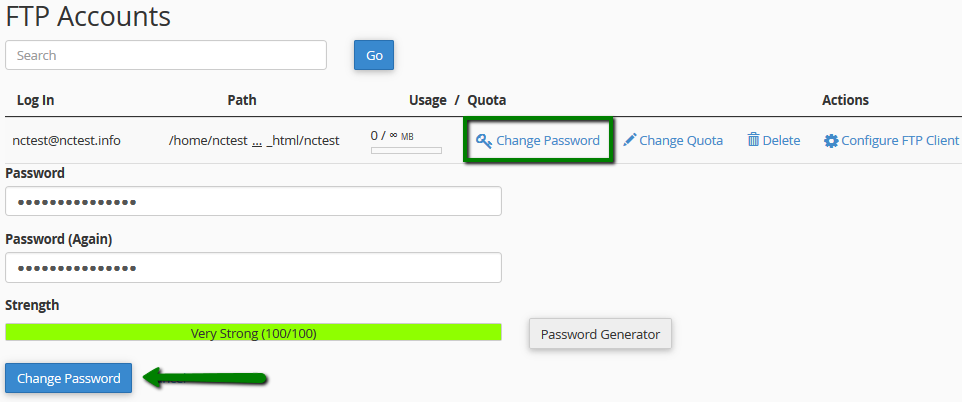
Change Password
To change an FTP account's password, perform the following steps:
1. Click Change Password for the FTP account for which you wish to change the password
2. Enter and confirm the new password in the appropriate fields
3. Click Change Password:
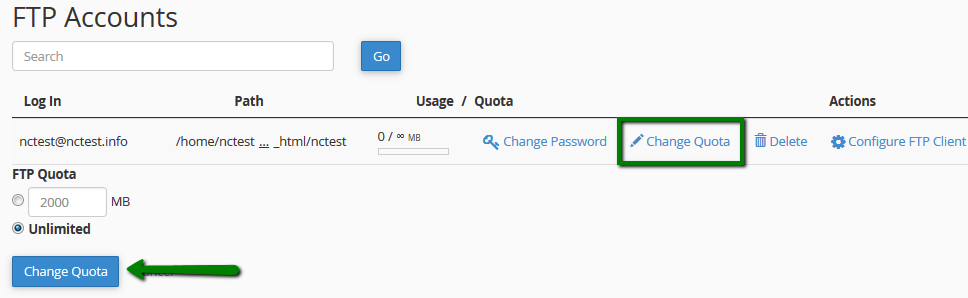
Change Quota
To change an FTP account's quota, perform the following steps:
1. Click Change Quota for the FTP account for which you wish to change the quota
2. Enter the disk space quota or select Unlimited
3. Click Change Quota:
Assign another directory
It is
not possible to change the FTP account’s path (directory) after it has been created. If you wish to change the account’s directory, the best way to do that is by deleting and
re-creating the FTP account.
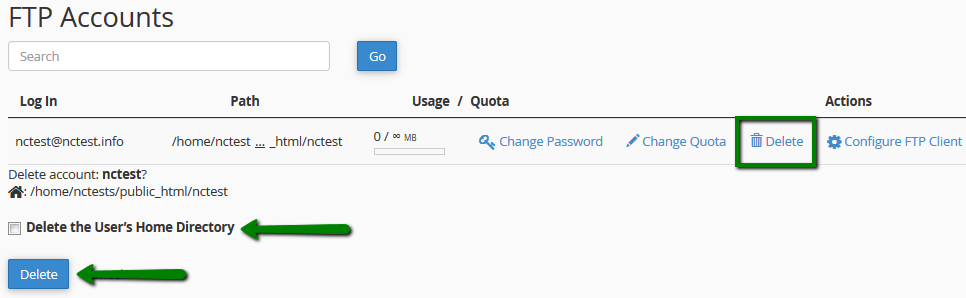
NOTE: deleting FTP accounts does not delete the directory it's granted access to if you choose Delete instead of the Delete the User’s Home Directory option.
To remove an FTP account, perform the following steps:
1. Click Delete for the FTP account that you wish to remove
2. Click the desired deletion option:
- Delete: remove the FTP account only. This will not remove the files that the FTP account's directory contains
- Delete the User's Home Directory: remove the FTP account and all of the files that the FTP account's home directory contains
- Cancel: do not delete the account
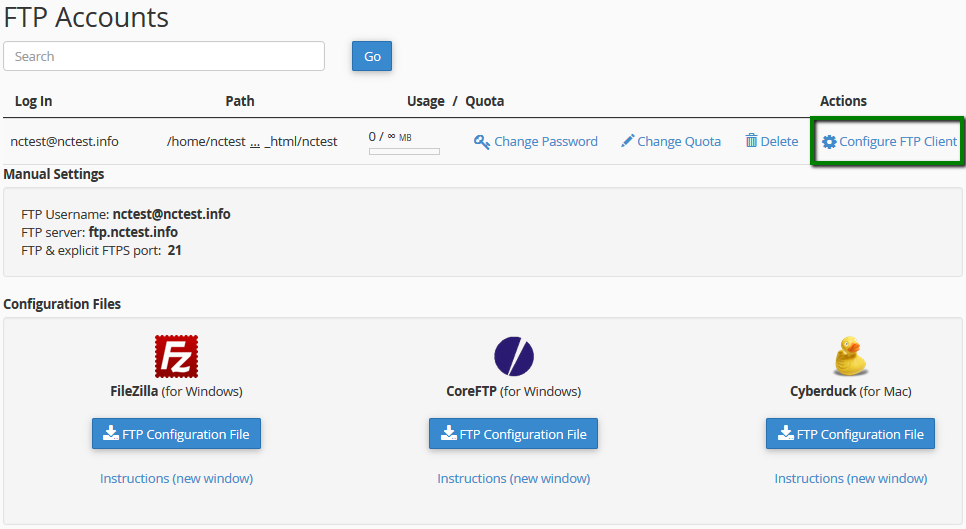
Configure FTP Client
To configure an FTP client, perform the following steps:
1. Click Configure FTP Client for the desired FTP account
2. Click FTP Configuration File under the desired FTP client's logo. You can choose between Filezilla, CoreFTP, or Cyberduck
3. Open the configuration script file downloaded to your computer. The FTP client automatically opens, configures itself and connects to your FTP server.
That's it!
Need any help? Contact our HelpDesk